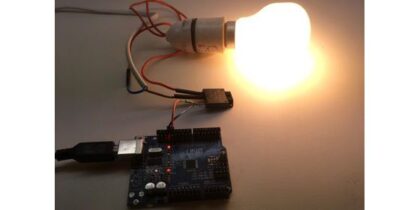
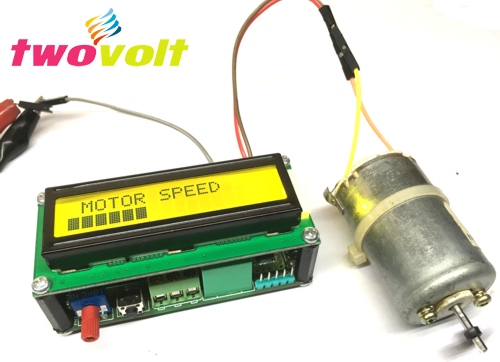
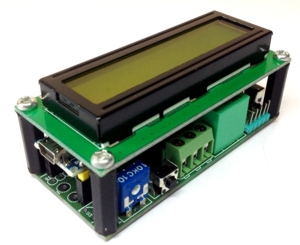
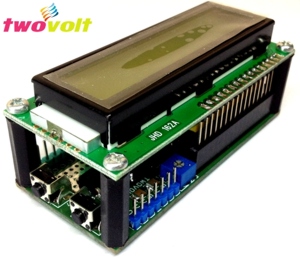
Arduino Based DC Motor Speed Controller with 16X2 LCD

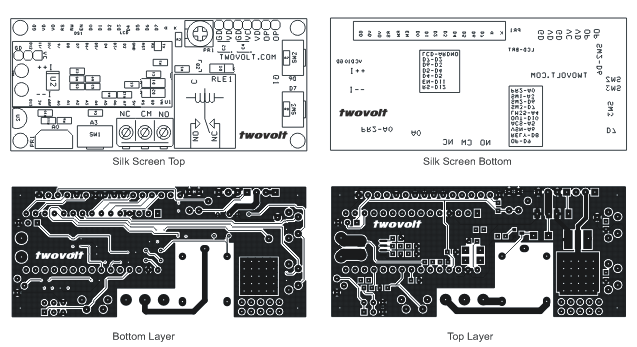
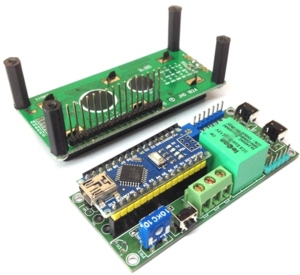
The DC motor controller has been designed using Multi-purpose LCD Arduino Nano shield, circuit, PCB layout and Arduino code available at our website www.twovolt.com , it can control DC motor 7-12V DC , it can drive motor upto 5Amps. Speed of motor can be set using trimmer potentiometer, 16X2 LCD display the Bar-Graph of speed of motor. Potentiometer is connected to Analog Pin A0 and Digital pin 9 which provides PWM output, this PWM signal goes to gate of MOSFET.
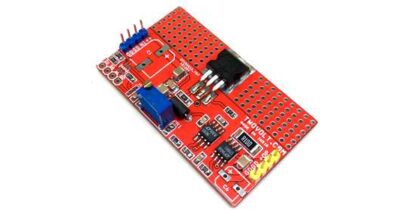
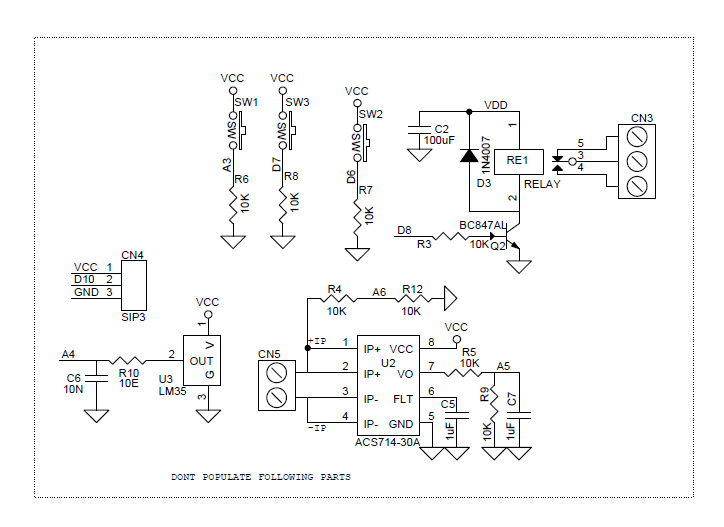
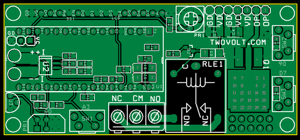
Compact multipurpose Arduino Nano 16X2 LCD shield can be used to develop various projects, shield provided with various things, LM 35 Temperature sensor, 3X Tactile Switch, Vertical trimmer Potentiometer, 12V Relay with NO/NC output, power Mosfet, AC714 current sensor and 16X2 LCD.
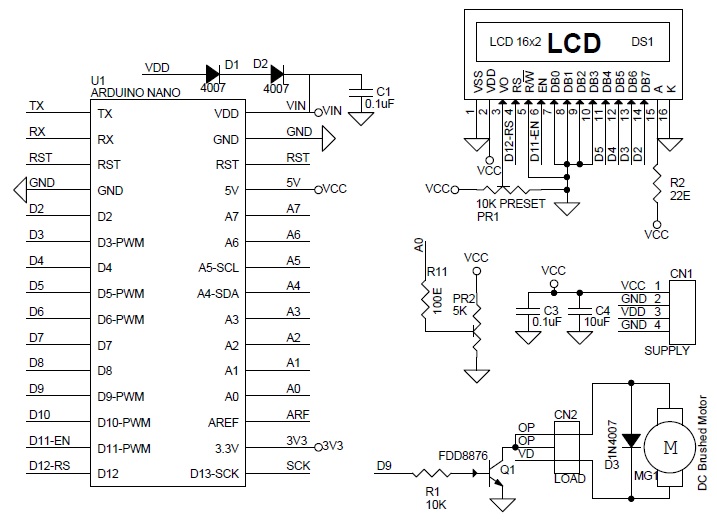
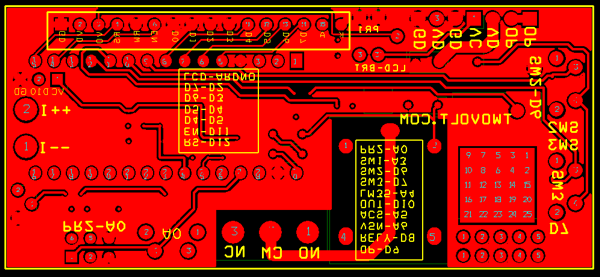
Arduino/LCD Pins
- LCD RS pin to digital pin 12
- LCD Enable pin to digital pin 11
- LCD D4 pin to digital pin 5
- LCD D5 pin to digital pin 4
- LCD D6 pin to digital pin 3
- LCD D7 pin to digital pin 2
- LCD R/W pin to ground
Arduino Pins Various Devices
- Switch 1 Arduino Pin A3
- Switch 2 Arduino Pin D6
- Switch 3 Arduino Pin D7
- Current Sensor ACS714 Arduino Pin A5
- Trimmer Potentiometer Arduino Pin A0
- LM35 Sensor Arduino Pin A4
- Power Mosfet Arduino Pin D9
- Relay Arduino Pin D8
Arduino Code
/*
Motor Speed Controller with 16X2 LCD Bar-Graph Display, Circuit, PCB Layout ,
and code available at our website www.twovolt.com, Its Modified code,
original author of the code is Rui Santos, http://randomnerdtutorials.com/
*/
// include the library code
#include <LiquidCrystal.h>
// initialize the library with the numbers of the interface pins
LiquidCrystal lcd(12, 11, 5, 4, 3, 2);
int potPin = A0; // Potentiometer
int motorPin = 9; // Driver FET PWM
int potValue = 0; // Pot Value
int motorspeed = 0; // Pot Value to PWM
int pBari = 0; // Bar-Graph
int i = 0; // foor loop
//progress bar character
byte pBar[8] = {
B11111,
B11111,
B11111,
B11111,
B11111,
B11111,
B11111,
};
void setup() {
// setup our led as an OUTPUT
pinMode(motorPin, OUTPUT);
// set up the LCD’s number of columns and rows:
lcd.begin(16, 2);
// Print a message to the LCD
lcd.print(” MOTOR SPEED”);
//Create the progress bar character
lcd.createChar(0, pBar);
}
void loop() {
// clears the LCD screen
lcd.clear();
// Print a message to the LCD
lcd.print(” MOTOR SPEED”);
//set the cursor to line number 2
lcd.setCursor(0,1);
// read the value from the potentiometer
potValue = analogRead(potPin);
// turns the potValue into a Speed Of the Motor
motorspeed=map(potValue, 0, 1024, 0, 255);
//Speed up the motor
analogWrite(motorPin, motorspeed);
// turns the brighness into a percentage for the bar
pBari=map(motorspeed, 0, 255, 0, 17);
//prints the progress bar
for (i=0; i<pBari; i++)
{
lcd.setCursor(i, 1);
lcd.write(byte(0));
}
// delays 350 ms
delay(350);
}